|
|
Post by alexander on Sept 21, 2015 17:27:07 GMT
Final work on the port galleries There are flowers and other ornaments on the towers. 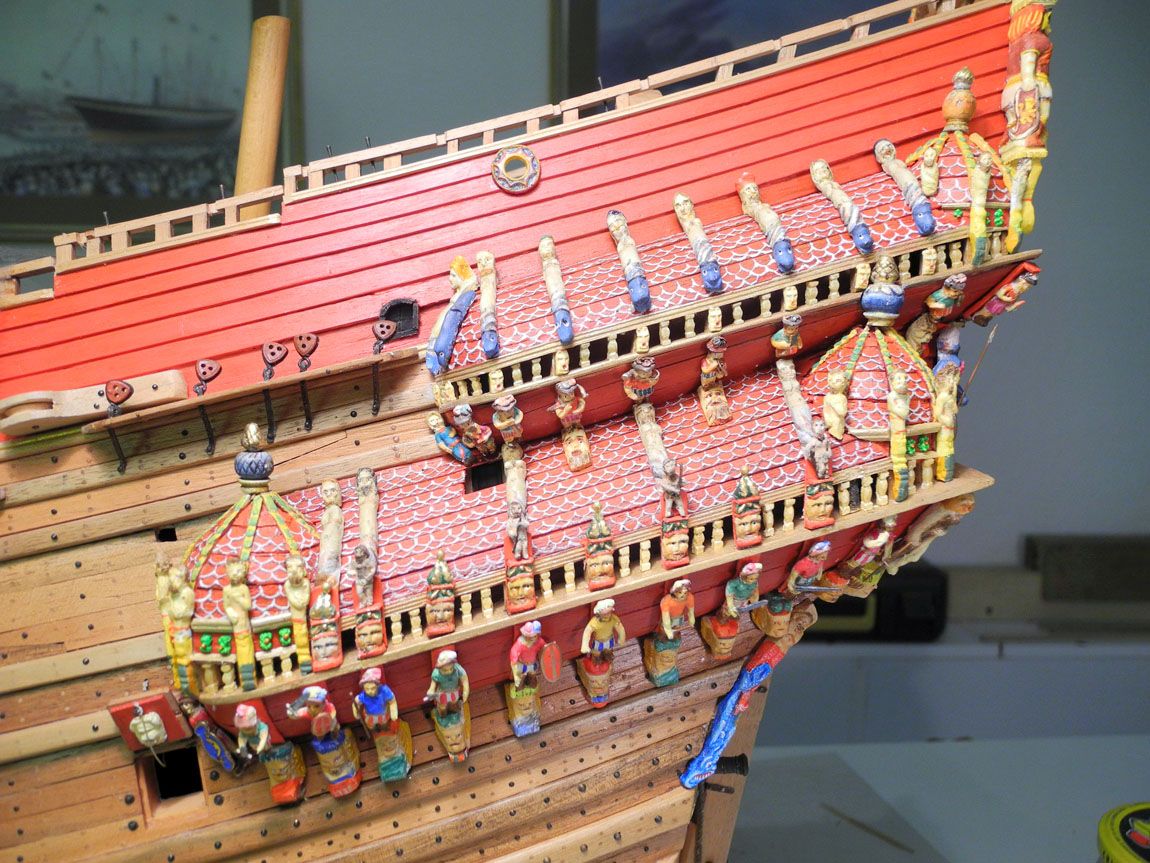 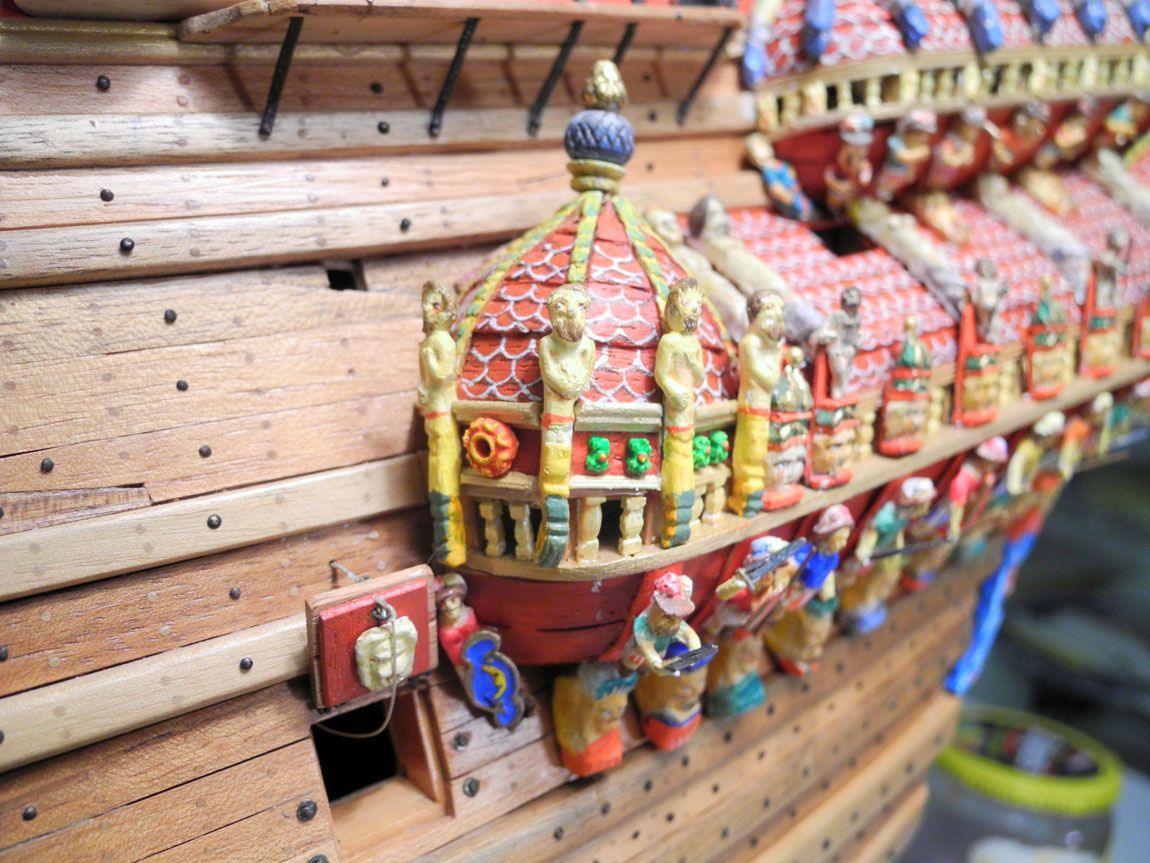 At the upper galleries small masks were attached. An carving was ultimately not to think, because they have a height of 5.5 mm. In order to get them to fit, it has then used several attempts with Milliput. For the other characters boxwood was the appropriate material. The casting was made in resin and a dental gypsum. The columns I have prepared in different sizes and with left, right or straight alignment boxwood and also cast from resin or dental gypsum. 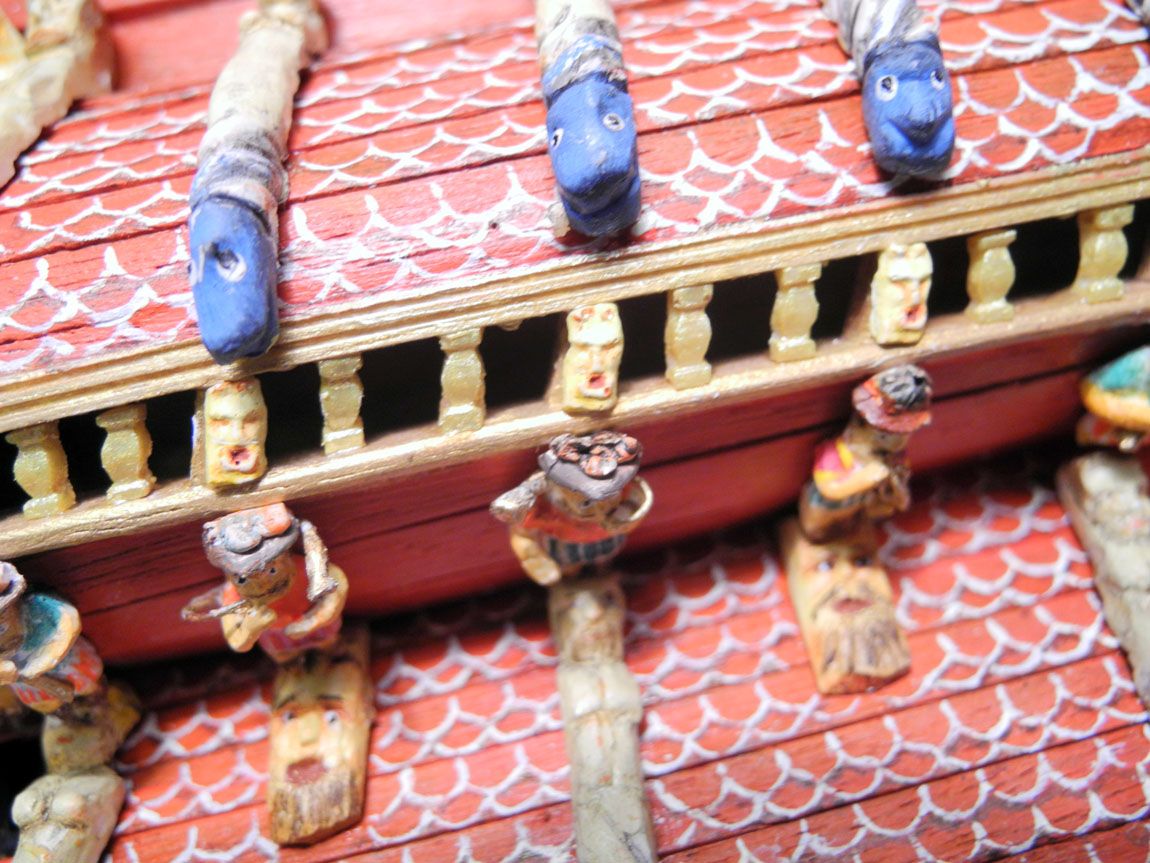 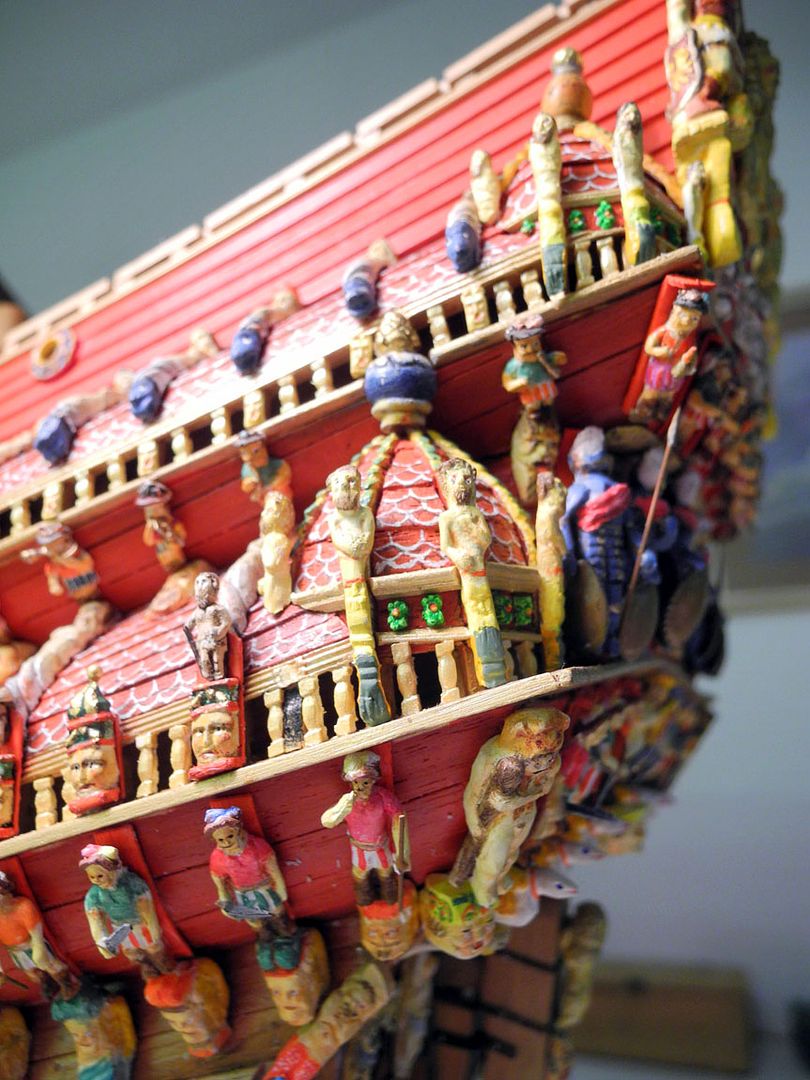 Regards, Alexander |
|
|
|
Post by alexander on Sept 21, 2015 17:27:37 GMT
 Double post
|
|
|
|
Post by Clayton on Sept 23, 2015 20:15:17 GMT
I like all of it. Good work Alexander!
|
|
|
|
Post by alexander on Sept 25, 2015 10:14:51 GMT
Thanks, Clayton
|
|
|
|
Post by alexander on Sept 27, 2015 10:18:33 GMT
Meanwhile, I have completed the starboard galleries with columns and small parts. 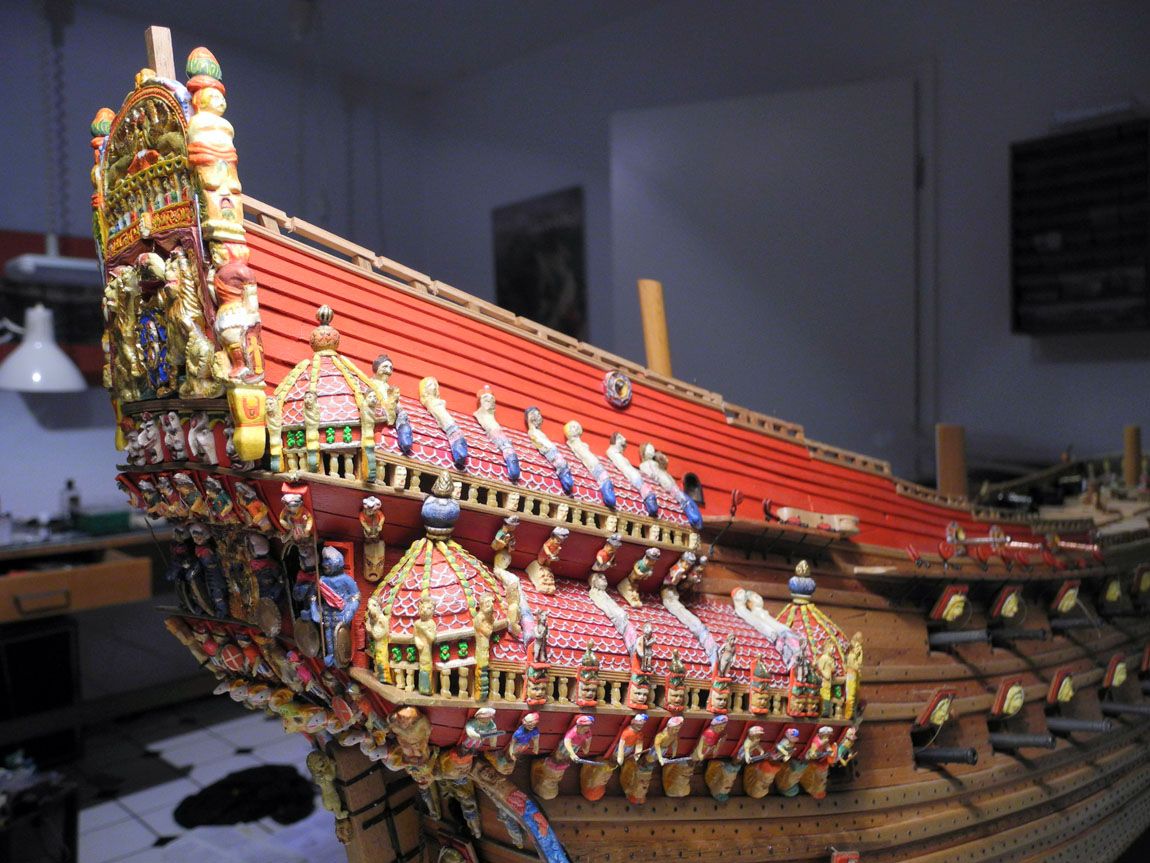 The cannons now look like this: 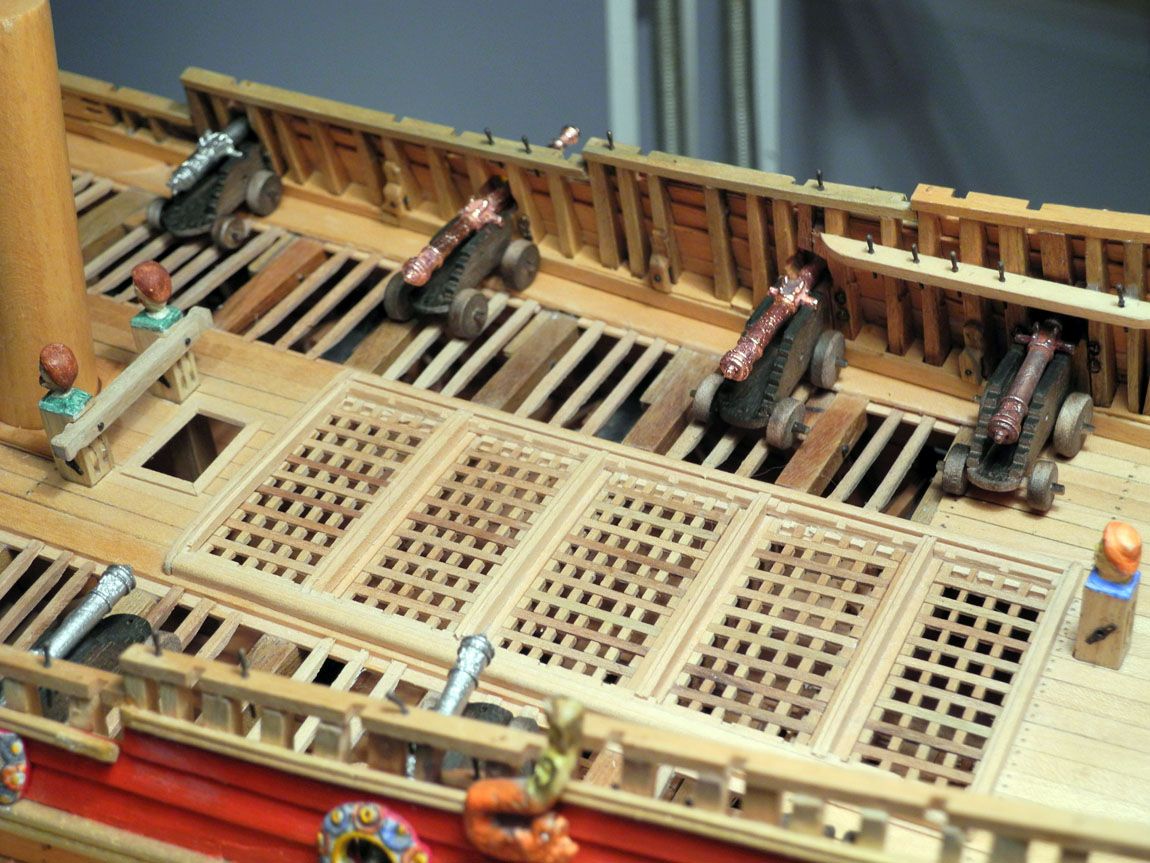 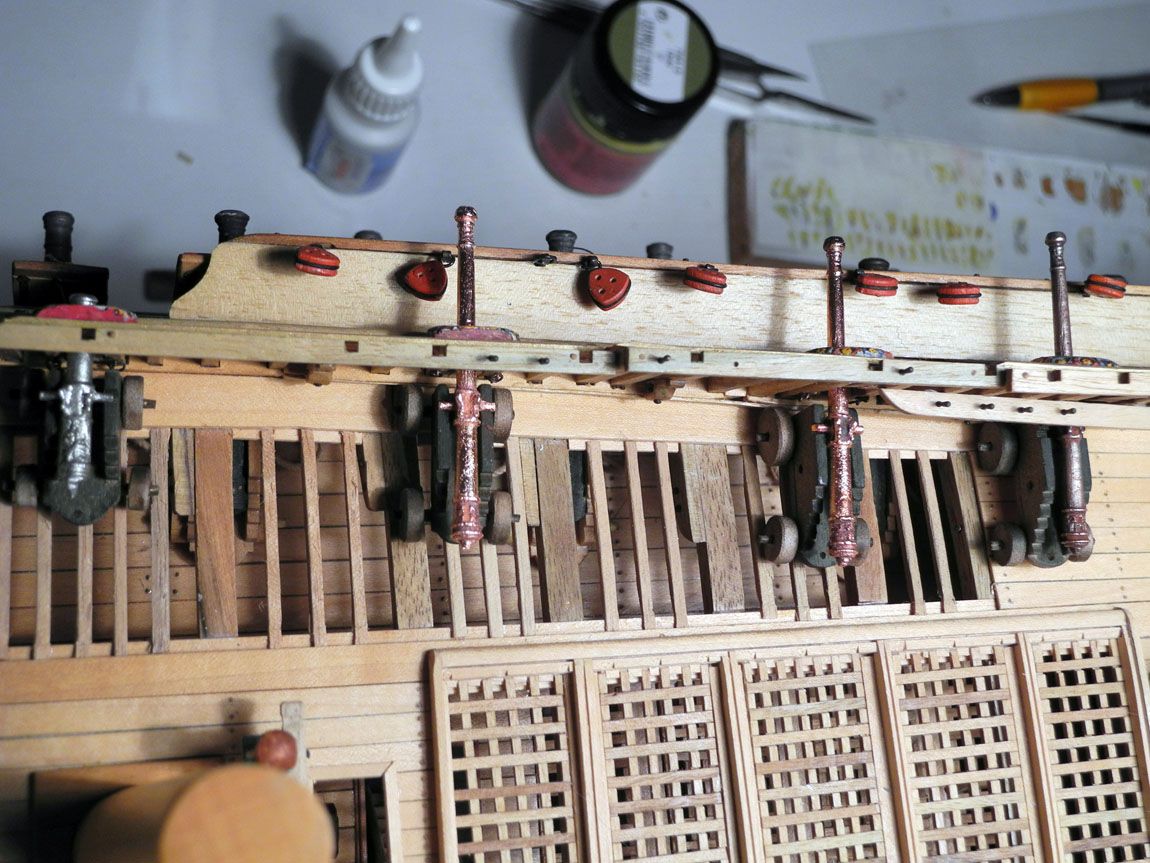 I have brushed the carriages in sepia (airbrush-color Schmincke Aero Color), so they are not as dead as a consistent black and you can later hopefully detect even the fittings. However, these are still lacking. The cannon at the left side is in the original tin casting. The right gun is primed with an alkaline coppergalvanic bath (duration about 3 hours). The two middle I the middle additional were treaded in an acidic bath further (duration about 2 hours). Incidently I treid the combination of the two baths. But I like the result very well and is a good starting point for the outstanding treatment with liver of sulfur. The copper surface is only a interstage. Regards, Alexander |
|
|
|
Post by fredhocker on Oct 15, 2015 7:52:09 GMT
Looking good! The copper color is not too far off, since Swedish guns seem to have had a low tin content in most cases.
Fred
|
|
|
|
Post by alexander on Nov 15, 2015 14:33:19 GMT
So, now I could finally solve the problems associated with the galvanizing. Here is a picture of the equipment for copper plating, as it is now: 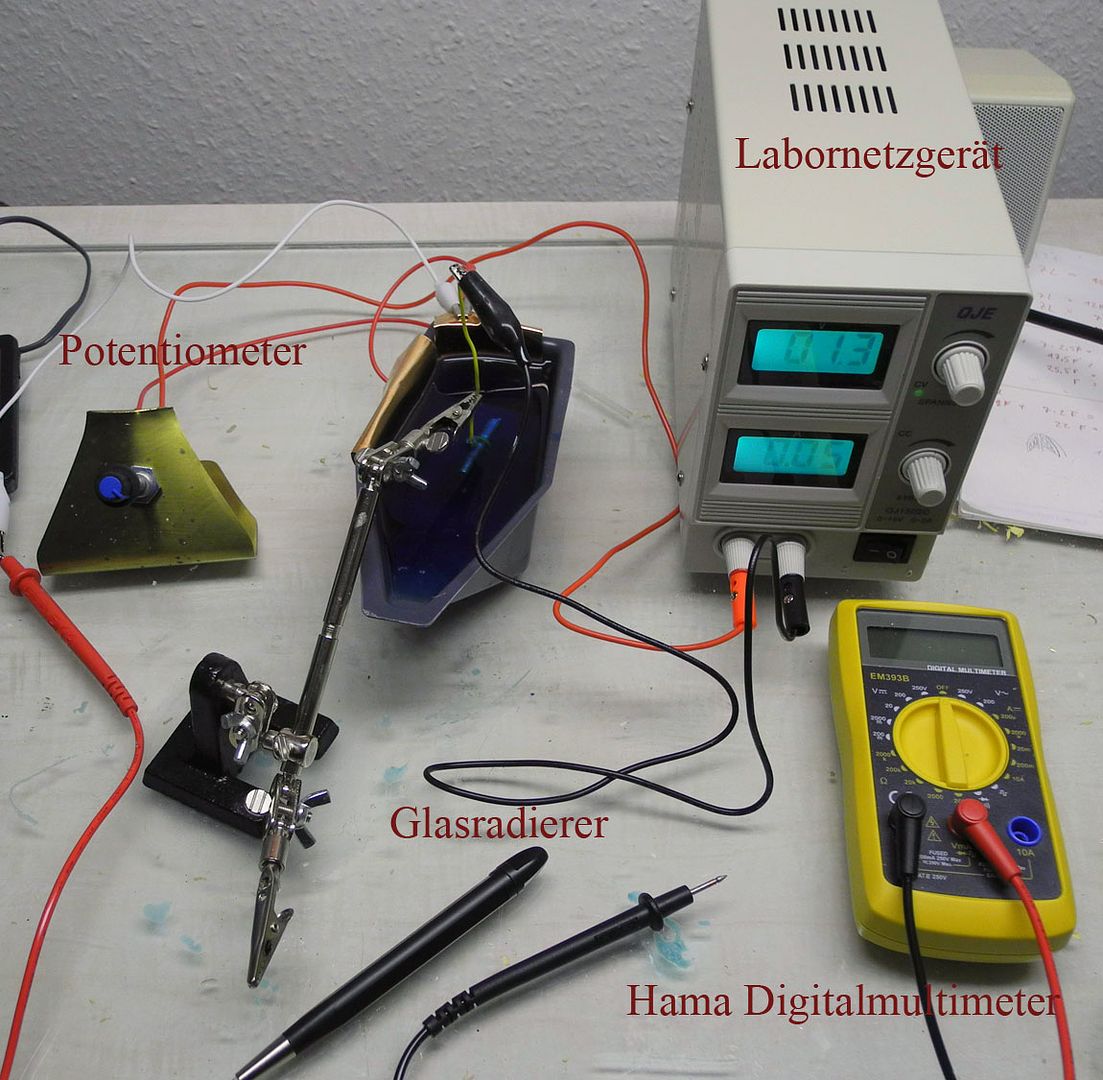 An affordable Laboratory power supply An ammeter from Hama A potentiometer (1k ohm, 4 Watt) for which I made a small mount. To prepare the casting, I used a fiberglass-eraser. With that you can clean the surfaces excellent. For copper plating is not necessary, but to be prepared for electroforming later, I built a rotating device. It is powered by a 220 V BBQ-spit-motor. Using a catenary mast of Maerklin I just clamped underneath. Thus, the weak current is passed to the rotating shaft. 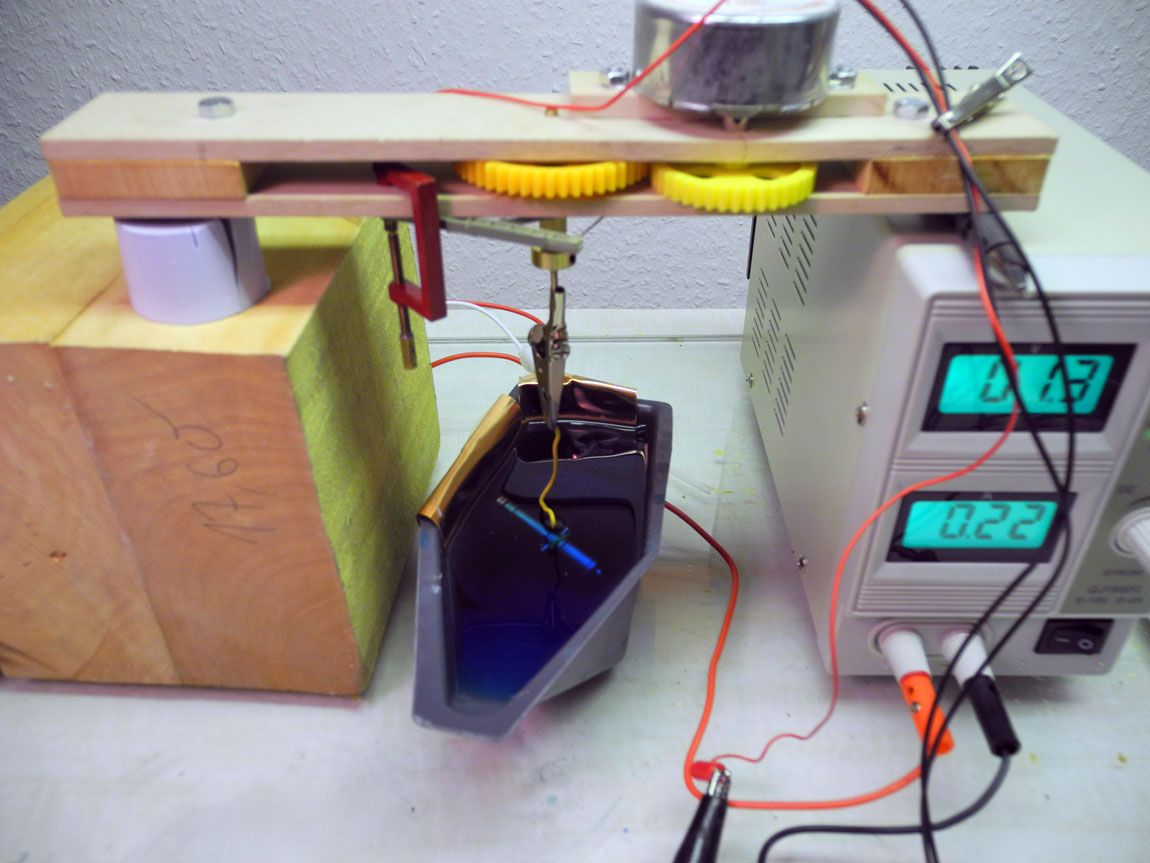 The copper-plated tubes I have placed on the plan put to the suspected armament of Vasa' weather deck as an illustration. I have noticed the current in milliamperes, with whom I have worked. Just in case someone needs examples. Generally, I've used the voltage of 1.3V. Why this value? It's a random value. For copper electrolyte (both alkaline and acidic)voltage must be between 1 and 2 volts. 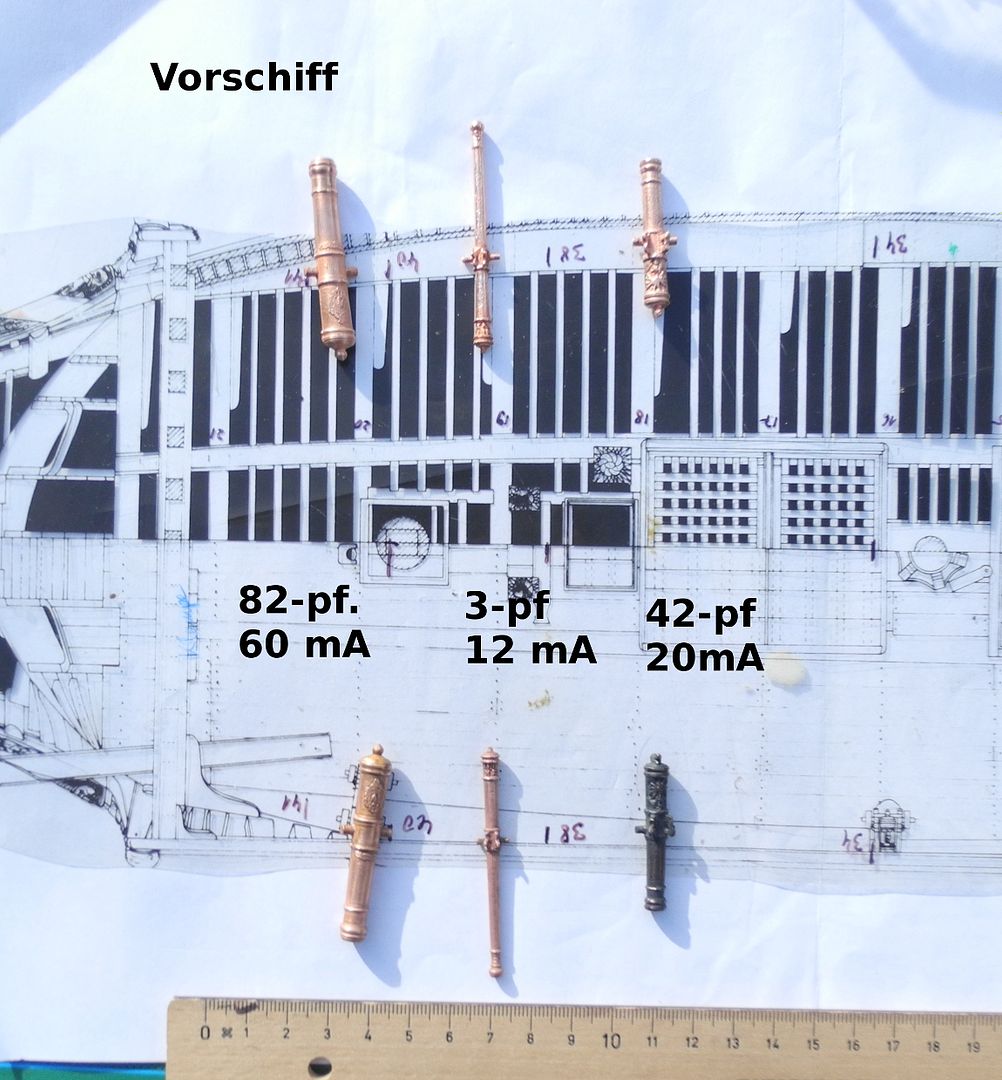 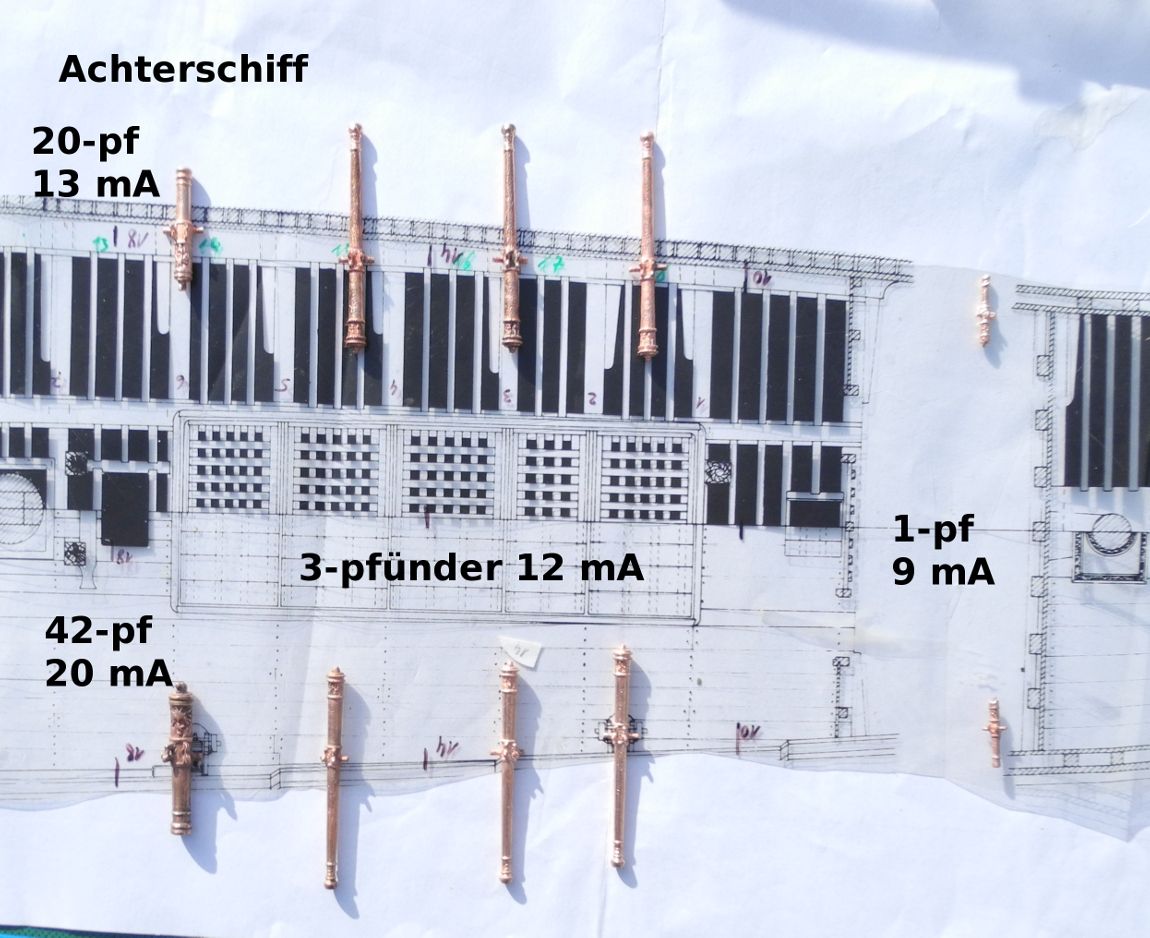 Subsequently, the tubes will blackened with liver of sulfur and carefully brushed with fine steel wool (0000) at the raised parts down to the copper plating carefully. Here is a picture with the sample installation: 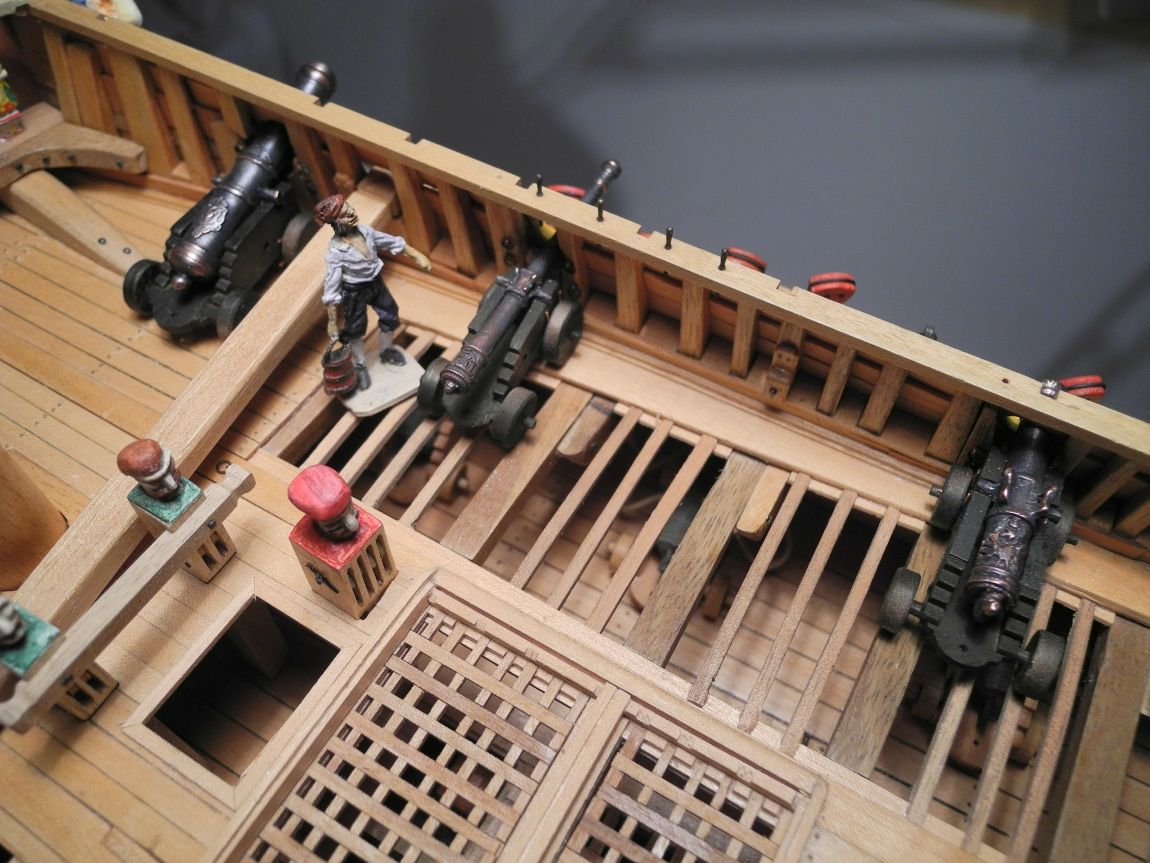 From left to right: 82-pounders, 3-pounder and 42-pounder Next to do are the fitting parts. Regards, Alexander[/b][/b][/b][/b] |
|
|
|
Post by matti on Nov 18, 2015 12:00:27 GMT
Great work, she is lovely n all her colors. Love the guns.
/Matti
|
|
|
|
Post by fredhocker on Nov 19, 2015 12:55:05 GMT
That is an effective way to get the final color, which is very close to how bronze weathers in service. Our replica gun, now two years old, is just starting to lose its shine and head for the patina you have created. Nice!
Fred
|
|
|
|
Post by alexander on Nov 20, 2015 9:47:49 GMT
Thanks, Matti and Fred
Can you please tell me what material are the pins with which the wheels are secured to the axles? Are they made of wood or metal?
Alexander
|
|
|
|
Post by fredhocker on Nov 20, 2015 9:50:40 GMT
The linch pins in the ends of the axles were iron, about 22 mm in diameter.
Fred
|
|
|
|
Post by alexander on Nov 20, 2015 12:19:15 GMT
Thanks Fred
very helpful that you've also specified the diameter
Cheers, Alexander
|
|
|
|
Post by alexander on Nov 27, 2015 9:03:01 GMT
Hi, Fred,
at other threads in this forum you announced that the pinrail above the gun at the deck in front of the cabin-doors has to be replace with a big cleat for the mainsheet. Because I want to finish the installation of the guns there: Could you please give me an idea how this looks like?
Cheers, Alexander
|
|
|
|
Post by fredhocker on Nov 27, 2015 9:13:37 GMT
Unfortunately the cleat itself does not survive, only the fastenings. This suggests a base about 11 cm wide spanning seven frames, with bolts through the third and fifth frame. The horns of the cleat might be about 75 cm across.
Fred
|
|
|
|
Post by alexander on Nov 27, 2015 10:44:30 GMT
Thanks, Fred
|
|