|
|
Post by tromp on Aug 29, 2019 16:18:47 GMT
I sold a ship model on Ebay once and it fetched a fairly good price. Well built models usually sell for good prices.
Peter
|
|
|
|
Post by tromp on Aug 4, 2019 10:39:26 GMT
|
|
|
|
Post by tromp on Jul 29, 2019 5:46:35 GMT
The bow-view is even smarter! Here it is the right way up:  She looks very finished, do only the flags need to be added? Peter |
|
|
|
Post by tromp on Jul 4, 2019 12:49:39 GMT
Hi Jan, thanks for joining and welcome to the Club!  Our very own Clayton Johnson has also built a model of Vasa's longboat. You should be able to contact him through his web-site: sites.google.com/site/clayton707/swedishwarshipwasaAny questions, please ask! Peter |
|
|
|
Post by tromp on Jul 4, 2019 12:42:37 GMT
She's lovely!
|
|
|
|
Post by tromp on Jul 4, 2019 12:40:44 GMT
I'd say back in the 17th century nobody would give a hoot if climbing up tarred ratlines was uncomfortable for the crew. I'd go for ratlines and shrouds in the same colour. The historic models of the Prins Willem (1651) and the Dutch Yacht in the Kriegstein Collection both seem to still have most of their original rigging and on both the ratlines seem to be tarred.
Peter
|
|
|
|
Post by tromp on Jul 3, 2019 10:47:37 GMT
You can paint the plank edges before they are attached. Once sanded they will give you a nice even black seam between the planks. You could also use thin black card glued to the plank edges before but trimmed after the planks have been attached. I wouldn't use thread but some modellers do but if you want to try it glue the thread to the edge before the planks is attached to the deck.
Please keep us posted
Peter
|
|
|
|
Post by tromp on Jul 3, 2019 3:18:26 GMT
Hi Algirdas,
Indeed some modellers wax their threads before use, this is to give the rigging a realistic appearance. It is done by holding the thread against a block of beeswax and then pulling at one end thus sliding the thread between the thumb and wax. The thread picks up wax giving it a flat appearance without bristles sticking out. After that you could treat it with a hairdryer so the wax is thoroughly pulled into the thread. This is to be done before the rigging is attached.
There is no way that you can treat rigging like doped aircraft fabrik to pull it tight.
I gather you are from Italy. Check out the German site modellbau-takelgarn.de There you can get rigging threads in all shapes and sizes at very reasonable prices.
Peter
|
|
|
|
Post by tromp on Jun 19, 2019 20:47:38 GMT
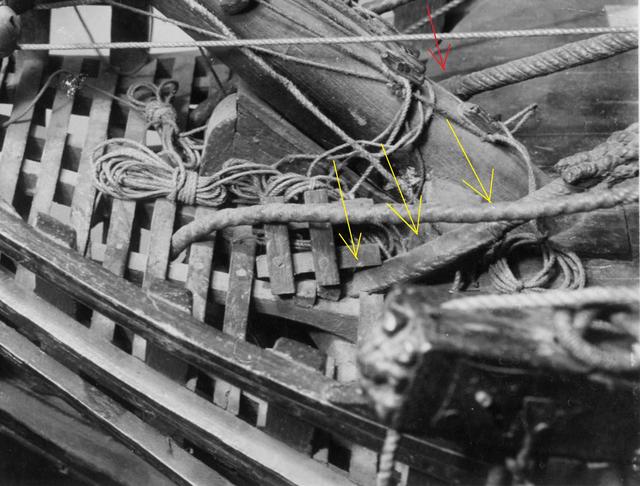
Hi Peter, Leather chafing gear cannot be continuous, since cowhides are limited in size, and is made up of segments. I would be curious to know if there had been chafing gear in the hole in the stem head - I would expect so. ... Fred This is hard to say Fred. Here we have the mainstay's chafing on the port side (yellow arrows) and on the starboard side (red arrow), note the stiches are facing outwards. The stay is probably covered with leather to protect it from being damaged by the "Twille" a huge Y-shaped timber supporting the bowsprit.
And here the starboard side. We can only see parts of the chafing, indicated here with arrows.

Here's a blown up detail of the above image. What I believe might be part of the stay is indicated with arrows. Somehow when the JPEG is blown up on my monitor I can see what might be stitches which are hardly visible here.

If this is the case then here too the stitches might be facing outwards, which could indicate that the starboard and port stay chafing are actually one piece. I don't know about the hole itself but I guess it wasn't a simple hole drilled through the stem head, obviously it was shaped somewhat as not to damage the stay that passed through here.
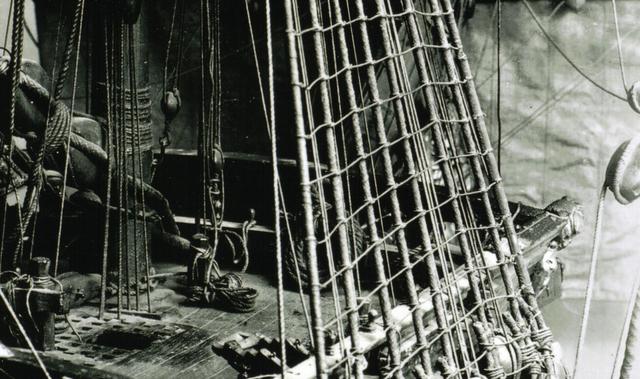
We have here port side looking at the foremast. The shroud to the left can be seen also covered with leather chafing. The stitches face towards the bow.

However, we have here the starboard side foremast shroud (to the right) and here we can see the stitches face aft.
Weren't the riggers bothered to always have the stitches facing in the same direction? Did it matter? Were they were sewn to the shrouds after the shroudes were rigged or before? Obviously the shrouds must have been served BEFORE they were rigged, so the riggers knew how long the sections had to be that were to be served, so perhaps they also knew to which sections the chafing was to be sewn before the shrouds were rigged.
Peter
|
|
|
|
Post by tromp on Jun 15, 2019 8:49:06 GMT
Here's a model that was decorated with the figure-set. Sure Looks tempting to me. What I don't like is the uneven bottom line of figures at the very bottom of the lower Gallery. But it should be in the modeller's abilities to sort this out. 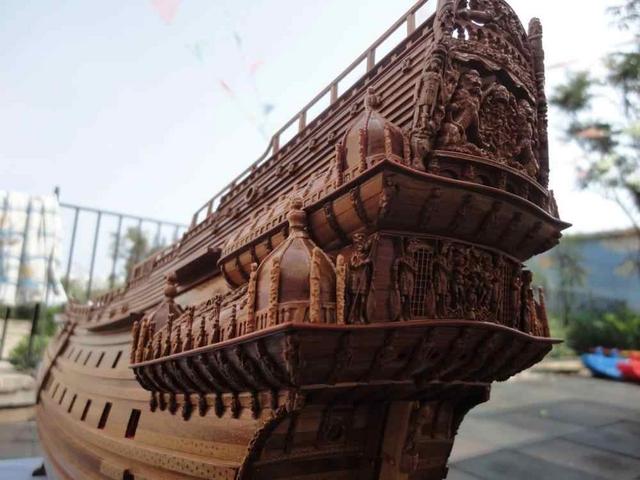 Peter |
|
|
|
Post by tromp on Jun 10, 2019 8:03:18 GMT
This book is expensive - but it's great! I bought mine at the Vasamuseum last November and it has been one of my favorite reads since. Here's the synopsis:
The story of Vasa began almost four hundred years ago. On 10 August 1628, the Vasa, newly-built flagship of the Swedish King Gustav II Adolf, set sail in Stockholm harbor. Less than an hour later, Sweden's great warship sank to the bottom of Stockholm harbor.
Various attempts were made to raise the ship. In the 1660s attention turned to salvaging the ship's consignment of bronze cannon, while the hull itself remained relatively undisturbed at the bottom of the sea until April 1961 when the great ship was raised from the waters of Stockholm harbor. Conservation and reconstruction was to prove a far cry from plain sailing... taking almost 30 years before the ship was placed on permanent display in the purpose-built Vasa Museum in central Stockholm.
This book, published in association with The Vasa Museum, documents how this huge ship survived the forces of decay; how the conservators of the 1960s approached the task of preserving such an enormous volume of waterlogged wood; what needs to be done to preserve the ship for future generations and how the ship is looked after on a daily basis.
Contents: Foreword; Preface; Acknowledgements;
Chapters: 1. Introduction; 2. On the Harbour Bottom; 3. Salvage and Excavation; 4. Conserving Vasa; 5. Reconstructing Vasa; 6. Conservation of Objects; 7. Life in the New Museum; 8. The Unexpected; 9. Stabilising the Climate; 10. Monitoring and Stabilising Vasa; 11. A New Support System; 12. Vasa s Legacy; Bibliography; Index.
Hardbound with 204 pages. The photographs are excellent, though as the title says, it deals mainly with the preservation of the ship, it also touches the construction, which interests me the most.
I paid around 50,- Euros for mine at the Museum shop but some online retailers will charge twice that amount.
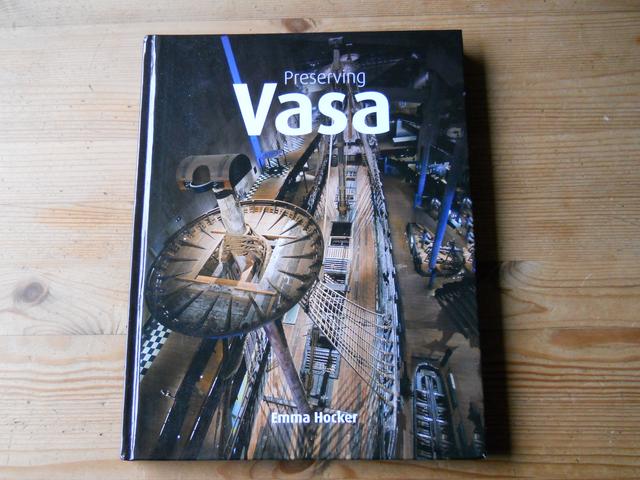
Peter
|
|
|
|
Post by tromp on Jun 7, 2019 18:24:00 GMT
Apparently the inhaul tackles weren't a permanent fixture like the outhauls. Perhaps several guns had to share one. In battle they were only needed when a gun failed to fire correctly. It was the recoil that sent the gun inwards again so perhaps an inhaul tackle wasn't essential. When parading it was a different subject, then they were needed to haul the guns inwards again, but this is why I tend to believe that several guns were to share one. I wouldn't include them on a model and most certainly not on all guns.
Peter
|
|
|
|
Post by tromp on May 26, 2019 8:56:28 GMT
Thanks for that Fred. This leather chafing can be seen on other parts of the rigging such the main mast stay, where it passes the formast. 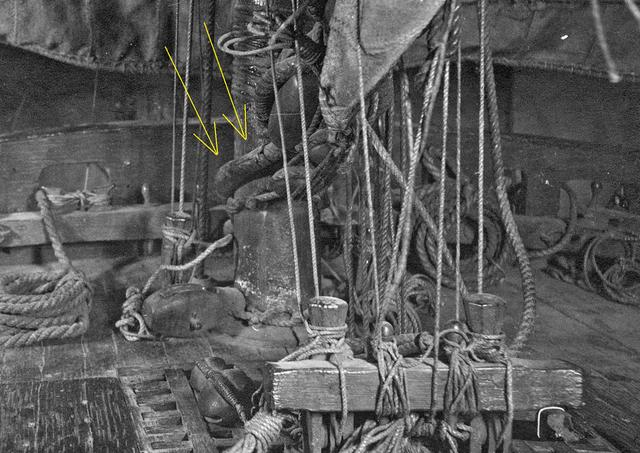 And here on the starboard side (I definately need to get this picture in better quality):  However, right in front of the foremast the chafing is interrupted but is continued where the stay leads past the bowsprit. I'm not sure if it is continued where the stay goes through the stem. 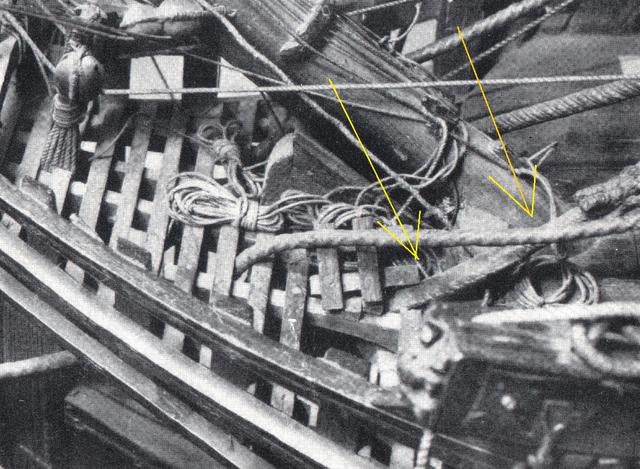 Are there remains of tarring on the fragments you've got? Peter |
|
|
|
Post by tromp on May 23, 2019 15:53:19 GMT
Hi all,
we have here an image of a contemporary model of a 17th century Dutch ship of war, sadly the model no longer exists, it was destroyed by bombing during WWII so it's no longer available for us to examine. There's something I noticed looking at this image and also other contemporary material of the stern decoration of Dutch 17th century warships: if you check the sculptures beneath the windows you can see that they fan-out towards to the top. Now I intially believed that this was due to the photographic distortion we have here as the figures' heads are closer to the photographer than their feet.

We have here a van de Velde Portrait of the Dutch ship the Waasdorp and here we can see observe same: these figures fan outwards.

Here we have a plan of the Vasa's stern and beneath the large windows we see a similar row of figures, and, yes, they too fan out. BUT - this is a plan-view, there is no photographic distortion.

And also this view from van Ijk's Scheepsbouw Konst shows us the same (though somewhat exaggerated):

Is this a common feature on Dutch built ships? Apparently the figures beneath the top row of windows on Vasa's stern were perfectly upright, while those beneath the bottom two windows fan outwards.
A lot of van de Velde drawings support this oberservation (but not all).

I don't know if there was any meaning behind it, perhaps it was only a widespread design feature. Also I don't what what the sculptures on Vasa represent but on the Hohenzollernmodel they apparently portrait alternating lions and Turks. It appears as if indeed in addition to the photographic distortion these sculptures were not perfectly upright but also fanned out everso slightly. This is sure how I'm going to do it on my model.
Peter
|
|
|
|
Post by tromp on May 21, 2019 18:53:54 GMT
She's coming along nicely, I like the colour of the hull. But do you realize how awkward it is having to turn the screen upside-down to view your pictures ?  Peter |
|


